How to use Date Picker Dialog in Android with Kotlin
Learn how to use the Date Picker Dialog in Kotlin. This guide explains how to create and display a date picker with the current date at rrtutors.com
In this Android example we will learn how to use Date Picker Dialog in Kotlin code. This example we will first create a datepicker dialog instance and set the current date to the dialog. When we click on button we will show the DatePicker dialog and user can pick any date from the dialog. We can also set max date limit to the datepicker dialog by datePickerDialog.datePicker.maxDate method.
Let's get started
Step 1: Create android application
Step 2: Update xml file with below code
<?xml version="1.0" encoding="utf-8"?>
<RelativeLayout xmlns:android="http://schemas.android.com/apk/res/android"
    xmlns:tools="http://schemas.android.com/tools"
    android:layout_width="match_parent"
    android:layout_height="match_parent"
    tools:context=".MainActivity">
    <TextView
        android:layout_width="wrap_content"
        android:layout_height="wrap_content"
        android:layout_centerHorizontal="true"
        android:layout_marginTop="50dp"
        android:text="RRTutors \nKotlin Date Picker Example"
        android:textAlignment="center"
        android:textColor="@color/colorPrimary"
        android:textSize="24sp"
        android:textStyle="bold" />
    <Button
        android:id="@+id/btnPick"
        android:layout_width="wrap_content"
        android:layout_height="wrap_content"
        android:layout_centerInParent="true"
        android:text="Pick Date" />
    <TextView
        android:id="@+id/textView"
        android:layout_width="wrap_content"
        android:layout_height="wrap_content"
        android:layout_below="@id/btnPick"
        android:layout_centerInParent="true"
        android:layout_marginTop="10dp"
        android:textColor="@color/black"
        android:textSize="16sp"
        android:textStyle="bold" />
</RelativeLayout>
|
Step 3: Update activity with below code
package com.rrtutors.highvalue

import android.app.DatePickerDialog
import androidx.appcompat.app.AppCompatActivity
import android.os.Bundle
import android.widget.Button
import android.widget.DatePicker
import android.widget.TextView
import kotlinx.android.synthetic.main.activity_add_sales.*
import java.util.*

class KotlinDatePickerActivity : AppCompatActivity(), DatePickerDialog.OnDateSetListener {
    lateinit var textView: TextView
    lateinit var button: Button
    var day = 0
    var month: Int = 0
    var year: Int = 0
    var currentDay = 0
    var currentMonth: Int = 0
    var currentYear: Int = 0
    override fun onCreate(savedInstanceState: Bundle?) {
        super.onCreate(savedInstanceState)
        setContentView(R.layout.activity_kotlin_date_picker)
        textView = findViewById(R.id.textView)
        button = findViewById(R.id.btnPick)
        button.setOnClickListener {
            val calendar: Calendar = Calendar.getInstance()
            day = calendar.get(Calendar.DAY_OF_MONTH)
            month = calendar.get(Calendar.MONTH)
            year = calendar.get(Calendar.YEAR)
            val datePickerDialog =
                DatePickerDialog(this@KotlinDatePickerActivity, this@KotlinDatePickerActivity, year, month,day)
            datePickerDialog.show()
        }
    }

    override fun onDateSet(p0: DatePicker?, p1: Int, p2: Int, p3: Int) {
        currentDay = p3
        currentYear = p1
        currentMonth = p2+1

        textView.setText(String.format("%02d",currentDay)+"-"+String.format("%02d",currentMonth)+"-"+currentYear)
    }
}
|
To set limit to the date picker dialog by
val calendar: Calendar = Calendar.getInstance()
datePickerDialog.datePicker.maxDate=calendar.timeInMillis;
|
Step 4: Here is the manifest file
<?xml version="1.0" encoding="utf-8"?>
<manifest xmlns:android="http://schemas.android.com/apk/res/android"
    package="com.rrtutors.highvalue">

    <application
        android:allowBackup="true"
        android:icon="@mipmap/ic_launcher"
        android:label="@string/app_name"
        android:roundIcon="@mipmap/ic_launcher_round"
        android:supportsRtl="true"
        android:theme="@style/Theme.HighValue">
        <activity android:name=".KotlinDatePickerActivity">
            <intent-filter>
                <action android:name="android.intent.action.MAIN" />

                <category android:name="android.intent.category.LAUNCHER" />
            </intent-filter>
        </activity>

    </application>

</manifest>
|
Step 5: Run the application
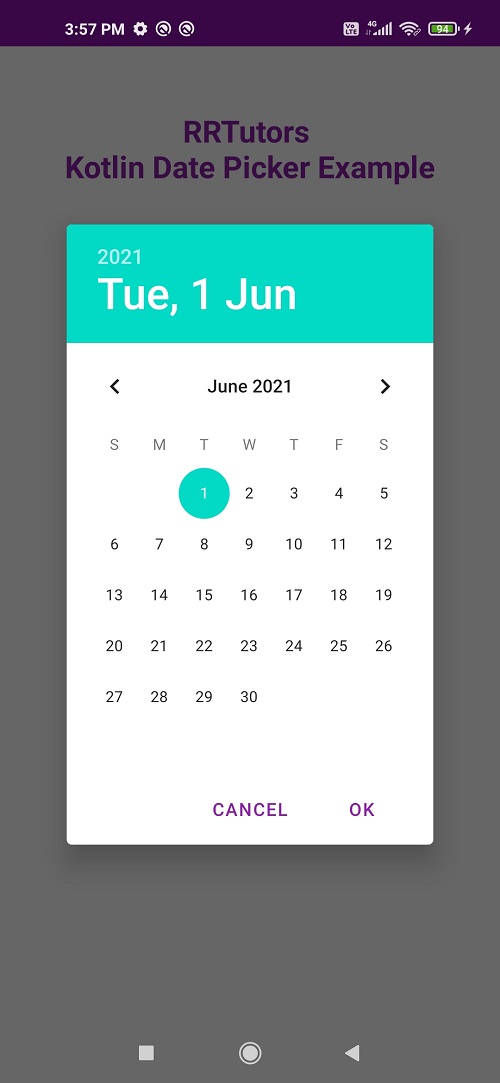
Conclusion: In this Android example code we covered how to show date picker dialog and how to set Date limit to the datepicker dialog.